If you’re new to shuttle tatting and unsure where to start — you’re not alone! Since there are so many different tools, threads, and accessories available, it’s worth pausing to consider what you really need before diving in. Starting with the right supplies can make learning easier, faster, and much more enjoyable.
In this beginner-friendly guide, we’ll cover:
- how to choose your first tatting shuttle
- which threads are best for beginners
- useful tatting accessories
- a simple tatting starter kit checklist to get you going.
By the end, you’ll know exactly what’s worth getting now — and what can wait until later.
Note: When my online tatting courses are ready, you’ll be able to learn step by step, from absolute beginner to confident lace maker — at your own pace. Sign up to be the first to know when they launch: Tatting Academy.
Why choosing the right tools matters
The right tools make a huge difference when you’re learning shuttle tatting. A comfortable shuttle, the right thread, and a few helpful accessories can make your first knots and rings much easier and more enjoyable. Preparing beginner-friendly tools and materials helps you focus on mastering the technique rather than battling your supplies.
Choosing your first tatting shuttle
Your shuttle is your main tool, so picking one that suits your style is key. Shuttles come in several designs, each with its pros and cons:
1. Post shuttles (most popular)
- Best for: Beginners learning the basics and for everyday projects.
- Pros: Simple, comfortable to use, lightweight, holds a good amount of thread.
- Cons: Thread must be wound manually when refilling.
- Popular brands: Clover, Pony, Prym.
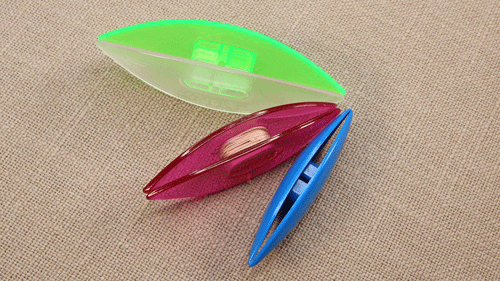
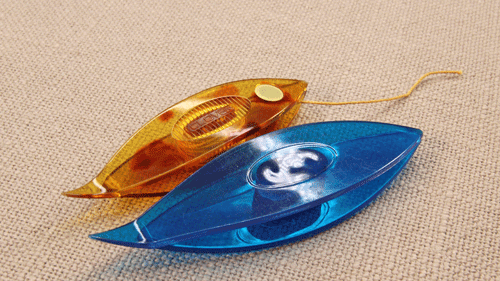
2. Flat shuttles

- Best for: Beginners learning the basics.
- Pros: Lightweight, usually the cheapest option.
- Cons: Thread must be wound manually when refilling; handling the wound thread with your fingers can dirty, damage, or feel uncomfortable.
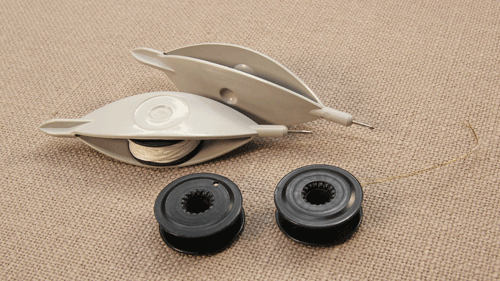
3. Bobbin shuttles
- Best for: Projects with multiple colours.
- Pros: Uses replaceable bobbins, easy to wind thread onto the bobbin, quick to change threads, often with tension control.
- Cons: Slightly heavier with more moving parts; bobbin mount (especially plastic) can loosen over time, causing thread to unwind too easily; fiddly for beginners.
- Tip: Look for ones with tension adjusters for better control.
4. Hooked shuttles
- Best for: Patterns with frequent joins or intricate picots.
- Pros: Built-in hook makes joining picots faster and easier, especially for delicate designs.
- Cons: The protruding hook can get in the way and sometimes snag the lace, making smooth tatting trickier until you gain experience.
Beginner’s tip: Consider not just the shuttle design, but also the material. Shuttles are commonly made from plastic, wood, or metal — metal being the heaviest. For beginners, a plastic post shuttle is ideal: lightweight, slightly flexible, comfortable to handle, and usually holds more thread.
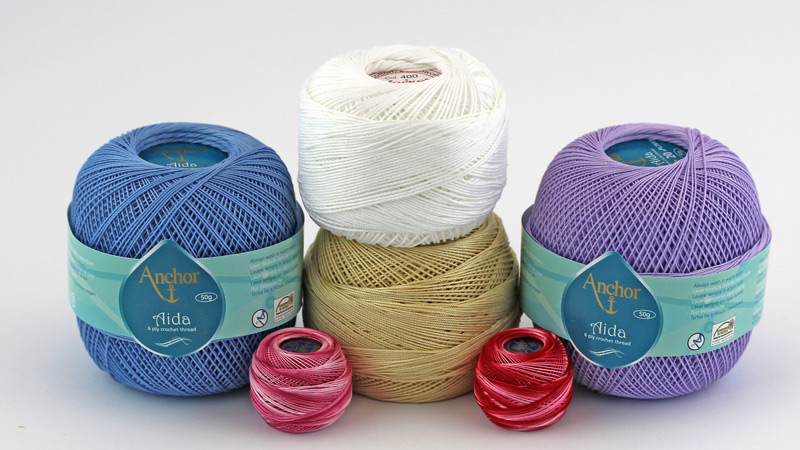
Choosing the right thread for tatting
Choosing the right thread affects not just the look of your lace, but — more importantly — how easy it is to learn tatting and form your first knots.
Cotton threads (recommended for beginners)
- Size 10 or 20 – Threads that are too thin make it hard to see and distinguish your knots, whereas thicker threads can make controlling tension and forming even knots more challenging.
- Strength & durability – Opt for high-quality cotton thread that resists breaking and abrasion, because weak or soft threads make tatting more difficult and can discourage beginners, especially if the thread tangles or snaps.
- Smoothness – Thread should be perfectly smooth, not fluffy, not stretchy, and free from loose fibres. Rough or fuzzy threads wear out quickly due to friction, making it nearly impossible to close rings and work properly.
- Colour choice – Light colours (white or pale shades) make it easier to see your knots clearly and check that they are flipped correctly.
- Popular brands – Lizbeth, DMC Cebelia, Ada. Strong, smooth threads that are relatively easy to find worldwide.
Beginner’s tip: Choosing high-quality thread is more important than the shuttle. A poorly chosen shuttle may at most make working less comfortable, but the wrong thread can make tatting harder or even impossible — after all, your lace is built entirely from knots.
Other tatting accessories
Besides your shuttle and thread, a few extra tools can make learning and creating tatting projects much easier.
- Small crochet hook – A small-sized hook is useful if using a shuttle without a built-in hook; ideal for joining picots or fixing mistakes
- Sharp scissors – For cutting thread cleanly and neatly
- Picot gauges / rulers – Help maintain consistent picot sizes
- Extra bobbins or shuttles – Useful when working with multiple threads or colours
- Shuttle winders – Make winding thread onto your shuttle or bobbin quicker and easier
- Cluny / tatting looms – For larger or more advanced lace motifs
- Sewing needle – A standard sewing needle to neatly hide thread ends in finished lace
- Other accessories – Thread conditioners, pins, and small containers to keep your tools organised
Tip: Beginners don’t need all of these at once. Start with essentials and add extras as you gain confidence
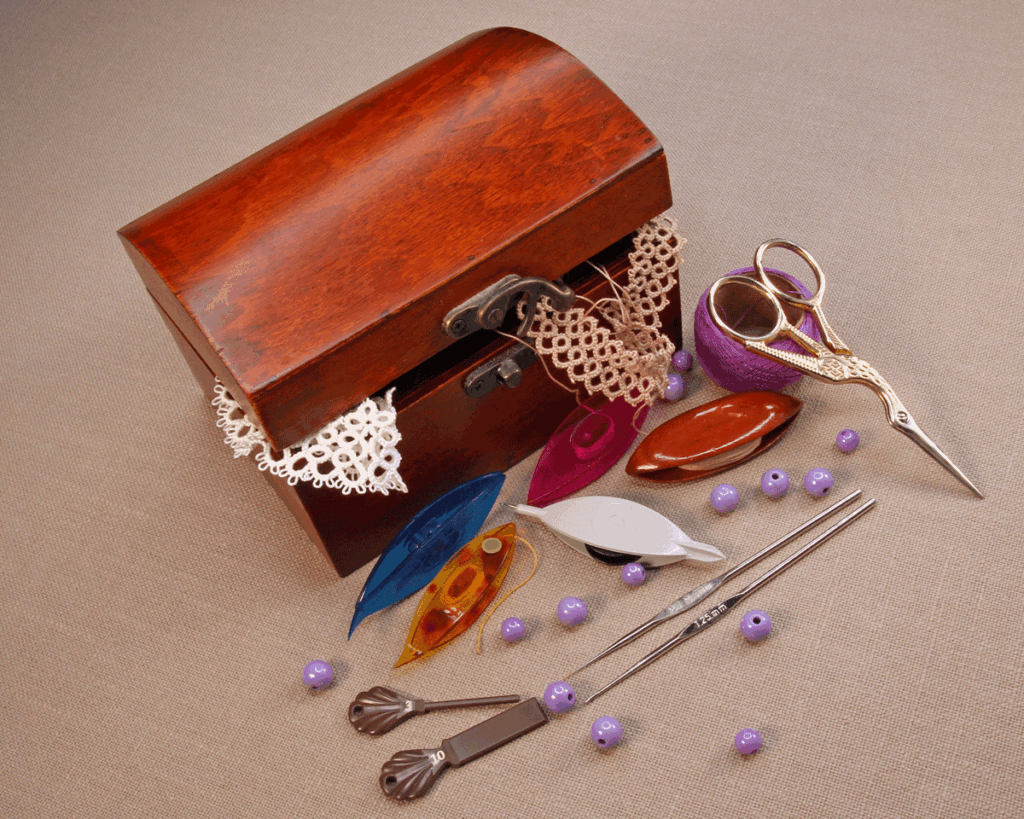
Your shuttle tatting starter kit:
> Essential
- 2 different shuttles
- 2 balls of high-quality mercerised cotton thread (size 10 or 20) – two different light colours
- Small sharp scissors
- Small crochet hook (if using a shuttle without a built-in hook)
> Optional (nice-to-have)
- Extra shuttles in different designs – practise with various sizes and shapes and find which shuttle is most comfortable
- Picot gauge – helps maintain consistent picot sizes for neat, even lace
- Beads, charms, and embellishments – turn tatting lace into jewellery for yourself, family, or friends
Ready to start tatting?
With just a shuttle, thread, and a little patience, you’re ready to explore the relaxing world of lace making.
Coming soon: My online tatting courses will guide you step by step, from absolute beginner to confident lace maker — at your own pace. Sign up to be the first to know when the courses launch and secure your spot: Tatting Academy.