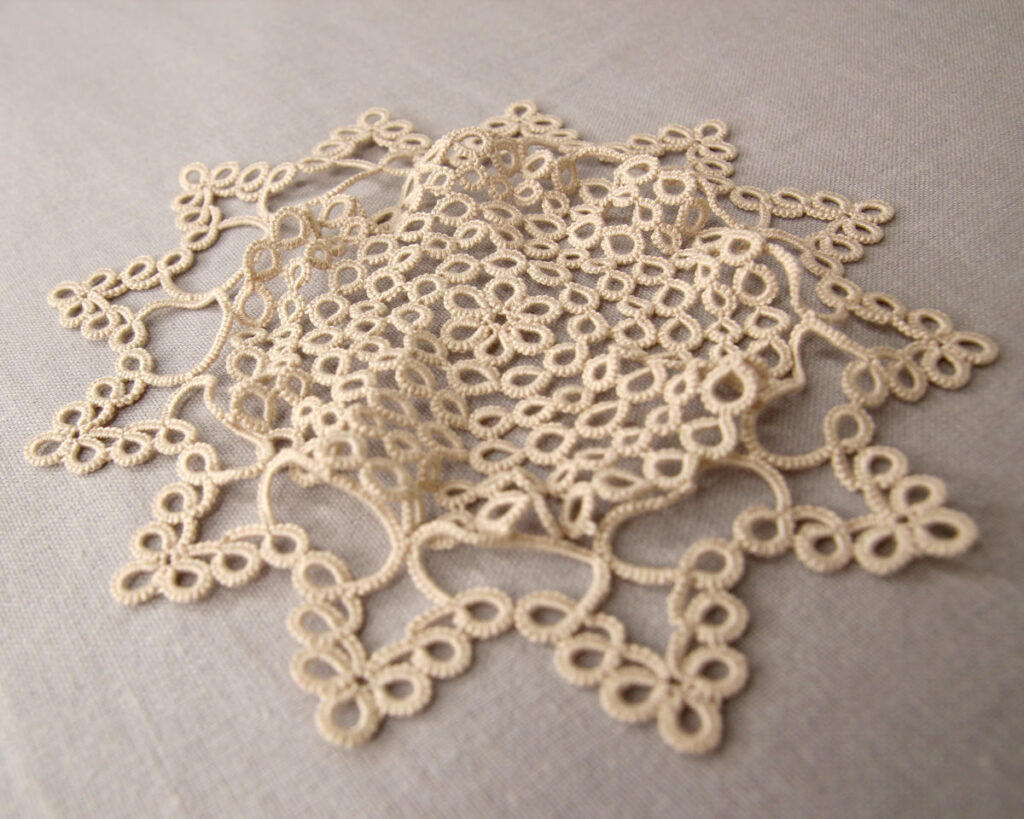
You finish a round of tatting and place your work down… only to realise you have a wavy doily instead of a perfectly flat circle. Maybe it ripples like a leaf, or cups into a bowl — but either way, it is no longer lying flat.
Frustrating? Yes. Random? Not at all.
A doily doesn’t lose its shape by accident — it’s a visible sign that something is off in the balance between structure, tension and stitch count. The good news? Once you understand what’s happening, you can fix it — or even prevent it entirely.
The 2 most common problems
If your doily isn’t flat, it usually falls into one of these two categories:
🔹 Cupping (bowl shape)
- edges lift up
- centre pulls in
This happens when the outer rounds don’t have enough length to lie flat.
🔹 Rippling (ruffling)
- edges start to wave or form ruffles
- the fabric spreads outward unevenly
This happens when the outer rounds have too much length and start to spread out.
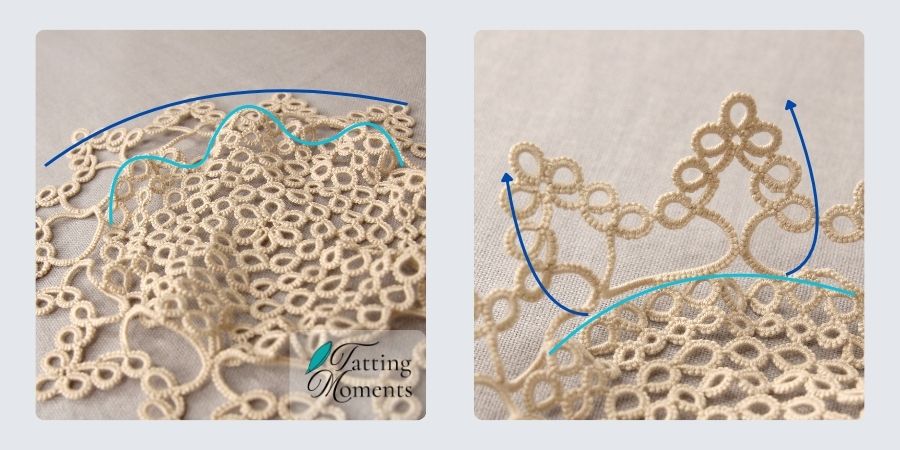
while too few knots in the final round cause a bowl shape (right). Photo and illustration by Tatting Moments.
The real reasons your doily is wavy:
1. Incorrect stitch count (the geometry problem)
A flat circle depends on balance – between diameter and circumference. Each round needs just enough stitches to match the growing circumference.
- too few stitches → cupping
- too many stitches → rippling
This isn’t just a crafting issue – it’s simple geometry.
2. Tension (too tight or too loose)
Even with a perfect pattern, your tension can completely change the outcome.
- tight tension → pulls inward → cupping
- loose tension → spreads outward → rippling
Your hands can override the pattern.
3. Thread type and size
Not all threads behave the same – even if the pattern says they should.
- softer thread → spreads more easily
- stiffer thread → holds its shape better
4. Pattern structure (rings vs chains)
Some constructions behave more rigidly, while others are more adaptable.
- ring-only rounds → tend to be more rigid and hold their shape strongly, which can make them less forgiving when matching the proportions of surrounding rounds
- ring and chain combinations → are more flexible and adaptable, making it easier for the pattern to “flow” between rounds and adjust to slight differences in tension or stitch count
5. Pattern imperfections (yes, it happens)
Not every pattern is perfectly calculated. Some are designed with the expectation that blocking or stiffening will be used as part of the finishing process to achieve the final shape.
In tatting, however, stiffening and heavy blocking are not a mandatory step in every project. A well-designed and well-executed doily should ideally lie flat on its own, without relying on starch, pins, or stretching it into shape while drying.
The best result is a piece that naturally settles into a flat form through balanced stitch count and consistent tension. In such cases, only minor adjustments may be needed — such as gently evening out picot tension or lightly pressing the piece for a refined finish.
This pressing, however, should never mean ironing directly onto the lace. Instead, it refers to a very gentle, indirect pressing method that preserves the delicacy of the work while improving its overall drape and smoothness.
A truly well-made doily should feel effortless in its final shape — flat, balanced, and delicate, without requiring corrective “force” to hold its form.
6. Your personal tatting style matters more than you think
Just like each of us has a unique handwriting — almost like a fingerprint — every tatter also develops their own natural working style. And this style can differ significantly from the designer of the pattern.
As a result, even when following instructions exactly, your finished doily may still behave slightly differently. This is completely normal and expected.
Think of it this way:
Someone writes an essay by hand, and it fills exactly three pages. You then copy the same essay word for word, using the same paper and pen. In theory, it should take up the same space — but in reality, it almost never does. It might spill slightly over three pages, or fall just short of them.
Now imagine writing that same essay twice yourself — once in the morning, relaxed with a cup of coffee, and again later in the day, tired, stressed, and in poor lighting. Even your own handwriting will look subtly different.
Tatting works in a very similar way. Even with the same pattern, thread, and tools, your tension, rhythm, and handling will never be perfectly identical to the designer’s – or even to your own work at another time.
This is not a flaw. It’s a natural part of handmade craft. The key is to understand it, respect it, and allow for it while working, instead of expecting absolute uniformity.
How to fix a wavy doily
Here are the most practical adjustments you can try, depending on what your doily is doing.
✔ If your doily is cupping (bowl-shaped):
- loosen your tension slightly
- add a few extra stitches if the pattern allows it
- check whether your chains are being pulled too tightly
✔ If your doily is rippling (ruffling):
- tighten your tension slightly
- reduce the stitch count or skip an increase round if appropriate
- check whether your joins are too loose or uneven
✔ Blocking — when it helps (and when it doesn’t):
- Blocking can smooth out minor ripples and help even out the overall appearance, but it will not correct structural issues such as strong cupping.
- A very practical, low-impact alternative to heat blocking is to simply press the doily gently into shape using weight. Placing it overnight under a stack of heavy books, under a rug, or even under a mattress allows gentle pressure and time to work together. This helps the fibres relax and settle into a flatter shape without the risk of heat damage. Unlike ironing, this method relies on patience rather than force — giving the threads time to naturally adjust and align into a smooth, even finish.can smooth out minor ripples and help even out the overall appearance, but it will not correct structural issues such as strong cupping.
When you should worry
A wavy doily is not always a problem.
✔ It’s usually fine if:
- there is slight waviness while you are still working
- the project starts to even out in the following rounds
❌ It’s a problem if:
- it cannot be flattened even with gentle hand shaping
- the distortion gets worse with each new round
A wavy doily isn’t a failure — it’s feedback.
Once you learn to read it, you’ll know exactly what to adjust: your tension, your stitch count, or sometimes even the pattern itself.
And that’s the moment you stop guessing — and start creating with confidence.